- Home
- Hardware
- SDKs
- Cloud
- Solutions
- Support
- Ecosystem
- Company
- Contact
news
ESP32-based Smart Wallet
Reporting from Shanghai, China
Jun 5, 2018
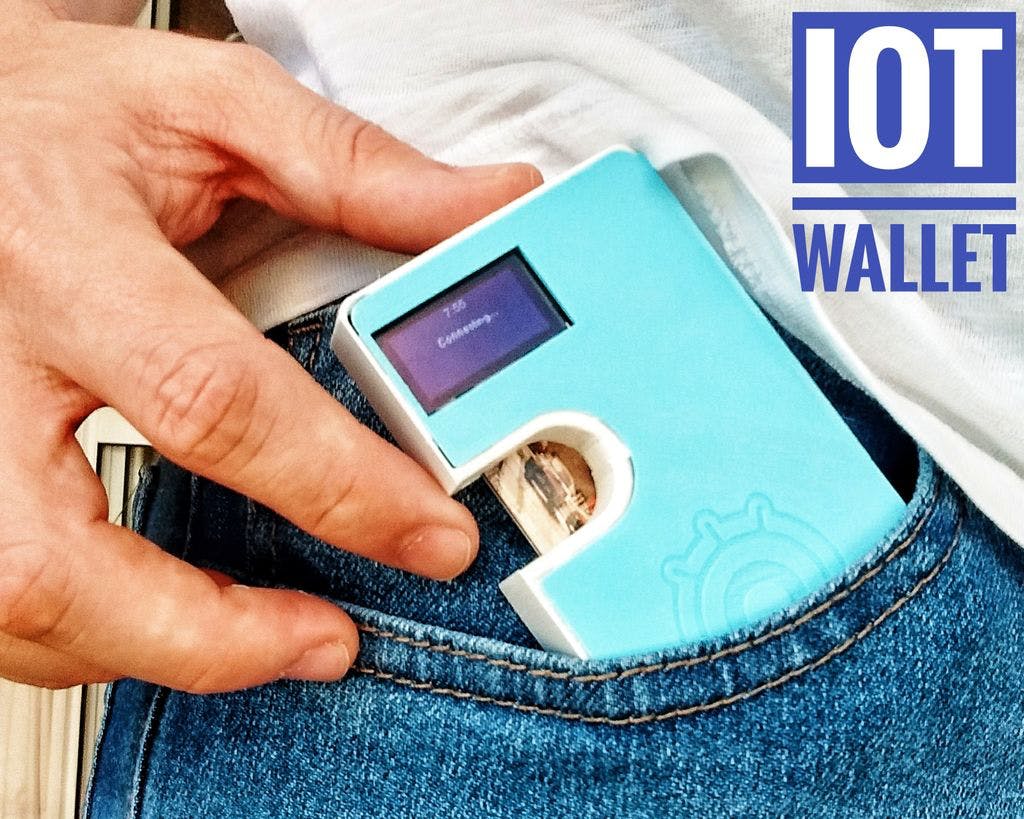
This IoT smart wallet can connect to the Internet, read the value of your cryptocurrencies from a Google spreadsheet and even function as a pedometer!
If you have already invested some money in cryptocurrencies, you probably know how volatile they are. They change overnight and you never know now much ‘real’ money you still have in your account. The same applies to stock markets. You put a little faith in a particular stock and the next day markets think it is worthless.
So, how do you keep track of the changes to the value of these assets and how can you know their current price? One option would be to work with some spreadsheets and update them regularly. Alternatively, you can create an IoT wallet, that is, a DIY gadget which will check these values for you!

This project belongs to Igor Fonseca Albuquerque, an electrical and mechanical engineer specializing in industrial instrumentation. For this project Igor uses Google spreadsheets to keep track of certain assets and update their values in a particular currency, according to the ticker values retrieved from the Internet. ESP32, then, is able to access such spreadsheets, using a Wi-Fi connection, while a summary of them can be shown on an OLED display. A 3D printer is used for creating the IoT wallet, in which certain electronic components are embedded for creating an IoT wallet prototype. Furthermore, a clock synchronized with the Internet and a step pedometer can be added to the same gadget, so that users can track everything in real time, while also doing some exercise. Igor’s original tutorial explains all this in detail.
This project is powered by an ESP32 development board (Firebeetle ESP32), which is really easy to use and program with the Arduino IDE. It has built-in Bluetooth and Wi-Fi modules, which come in handy for a variety of additional projects. The ESP32 dev board is also equipped with a USB connector for a 3.7V battery, which is really useful for assembling this project. It is worth-noting that other varieties of ESP32- or ESP8266-based boards can be used in this project. Depending on the board that users choose, some of the settings, as well as the dimensions of the case, would have to be modified accordingly.

Overall, Igor’s tutorial can be used for:
- Learning how to track and update your assets, using a Google spreadsheet;
- Programming ESP32 with the Arduino IDE;
- Reading values from a Google spreadsheet with an ESP32 device;
- Learning how to 3D-print by using flexible filaments;
- Practising one’s electronics and soldering skills.
Readers can use parts of Igor’s original tutorial to create their own gadgets or follow it till the end and produce their own IoT wallet.


 LinkedIn
 微信
微信
 Twitter
 Facebook
